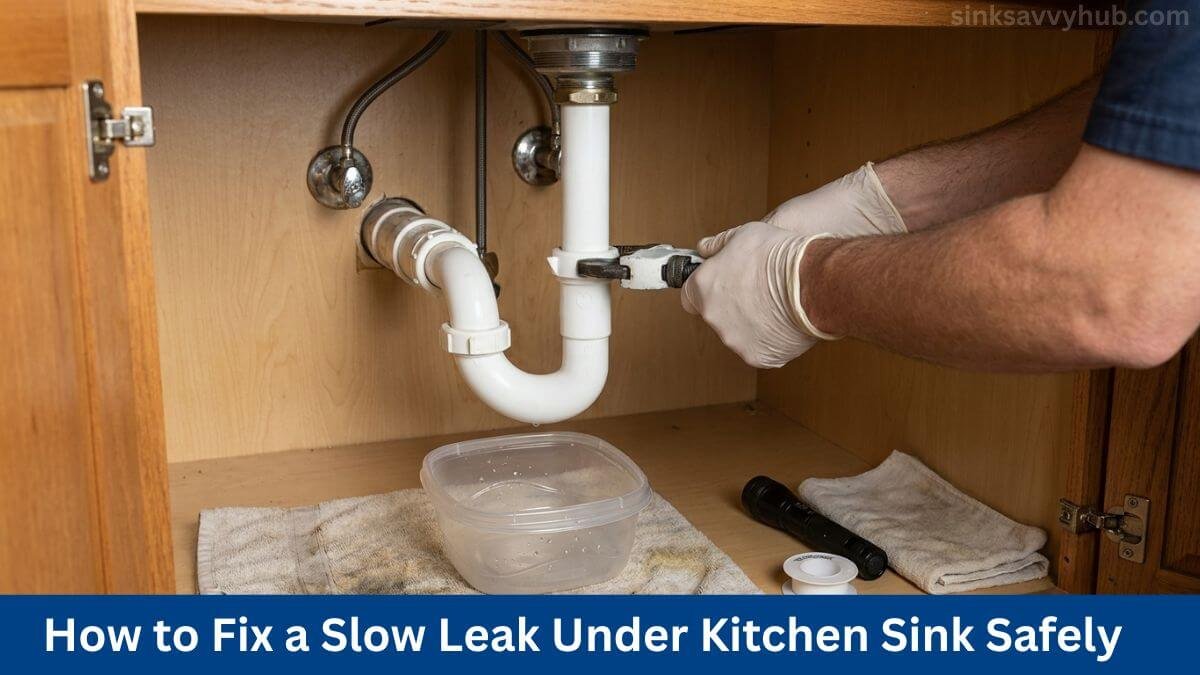

A slow drip under the sink may not look serious at first. I have seen small leaks go unnoticed for days. Then the cabinet starts to smell damp, supplies get stained, and the base begins to swell.
In this guide on how to fix a slow leak under the kitchen sink, I will show how I find the source first. Then I will explain how I deal with the leak before it causes bigger damage.
Why You Should Never Ignore a Slow Leak Under the Kitchen Sink
I learned this the hard way. A slow leak under the kitchen sink can look minor at first, but it can damage the cabinet long before it looks serious. In my case, the space still looked “mostly fine” from the front, but the bottom panel had already started to swell and smell damp.
What makes this kind of problem tricky is how quiet it is. The drip may be small. It may only show up after I run water. It may stop for hours and make me think the issue is gone. But that is exactly why it gets ignored. Meanwhile, moisture keeps building up in a dark, closed space under the sink.
What Makes Slow Sink Leaks So Common
From what I have seen, these leaks happen because the kitchen sink gets used so often. Hot and cold water, dishwashing, rinsing veggies, and cleaning pans all stress the plumbing.
A few common causes kept showing up when I checked under the sink:
- loose slip nuts that slowly back off over time
- worn washers that no longer seal well
- a basket strainer seal starting to fail
- small cracks in the drain parts that are easy to miss
- Aging water supply lines with wear near the fittings
- tiny leaks that happen only while the sink is draining
That last one can fool anyone. I have seen an area stay dry most of the day, then show a drip only after dinner cleanup. That kind of leak is easy to miss unless I am watching for it at the right time.
Early Signs That Something is Leaking Under the Sink
The first signs are often subtle. For me, it was never a dramatic puddle at the start. It was small things that felt off.
Here is what I would pay attention to early:
- The cabinet floor feels damp when I touch the back corner
- There is a musty smell when I open the door
- The particleboard looks swollen or discoloured
- stored cleaning items feel wet for no clear reason
- A drip appears only after I run water or drain the sink
One thing I noticed is that under-sink water damage often starts before there is a visible mess. A sponge bottle, trash bag box, or cleaner container may get damp first. That is usually the clue that tells me the leak under the kitchen sink has been there longer than I thought.
Ignoring it gives the water more time to soak in. Catching it early gives me a much better shot at a simple fix instead of cabinet repair.
Start Here First to Identify the Source of the Leak Under the Kitchen Sink
The first thing I do is find the exact source before I tighten or replace anything. A leak under the kitchen sink can travel along a pipe, then drip from a spot that makes the real cause look easy to miss.

I learned that lesson after wiping up the same wet patch twice and blaming the wrong part both times. From the front, it looked like the p-trap was leaking. When I slowed down and checked it in detail, the water was actually starting higher up and running down the pipe.
Clear the Cabinet and Dry Everything Completely
I always start by emptying the space under the sink. I take out the soap, sponges, cleaning bottles, bins, and anything else sitting on the cabinet floor. If I leave things in place, they hide the leak and soak up water before I can see where it begins.
Then I dry the whole area well. I wipe the pipes, shut-off valves, fittings, and the base of the cabinet with a dry cloth or paper towels. This gives me a clean starting point. If everything is already wet, it is much harder to trace the fresh drip.
Check When the Leak Happens
This part helps narrow things down fast. I watch for when the leak shows up. When the leak starts as soon as I turn on the faucet, I check the water supply line, shutoff valve, and faucet connections first.
A drip that appears only while the sink drains usually points me toward the drain pipe, basket strainer, tailpiece, or p-trap. If it leaks all the time, even when the sink is not in use, I treat the supply side as a strong suspect. That simple timing check has saved me a lot of guesswork.
Use a Simple Leak-Tracing Method
My easiest method is paper towels. I place dry paper towels under each connection and around the spots that look suspicious. Then I test the sink in stages.
I run hot water first, then cold water. After that, I fill the sink and let it drain. I do not watch for the final drip hitting the cabinet floor. I watch for the first place that turns damp. That first wet spot tells me much more than the puddle below.
It feels a bit slow the first time, but it is still faster than replacing the wrong part on a Saturday afternoon.
The Most Common Leak Points Under a Kitchen Sink
In my experience, these are the places worth checking first:
- p-trap joints
- basket strainer under the sink drain
- tailpiece connection
- water supply shut-off valves
- faucet supply lines
- dishwasher drain hose connection
- If someone has installed a garbage disposal connection

Once I find the true source of the leak under the kitchen sink, the repair gets much easier. The hard part is not always fixing it. The hard part is catching where the water really starts.
Fixing a Leaking P-Trap Under the Kitchen Sink
A leaking p-trap under the kitchen sink is often one of the easier leaks to fix. From my experience, the issue often comes from a loose slip nut, a worn washer, a bad pipe angle, or a cracked plastic part.

I like this kind of repair because the cause is often visible once I get down there with a flashlight. The annoying part is that the drip can make the whole area look guilty, even when the real problem is one joint.
What the P-Trap Does and Why It Leaks
The p-trap is the curved pipe under the sink. Its job is to hold a little water so sewer gas does not come back up through the drain. It is simple, but it has a few connection points, and those spots can start leaking over time.
I’ve noticed this a lot: slip joints often loosen a bit. This usually happens when someone moves things in the cabinet or bumps the pipe while cleaning. I’ve seen leaks occur when we cram too many spray bottles under the sink. They can push against the drain parts without you even noticing.
How to Tighten a Loose P-Trap Safely
When I suspect the p-trap, I start small. I hand-tighten the slip nuts first. A lot of the time, that is enough.
If the nut still feels loose, I use pliers for a very small extra turn. Just a little. Plastic fittings do not need brute force. I learned that the hard way on a weekend repair when one extra crank turned a minor drip into a cracked nut and a second trip to the hardware store.
When to Replace the Washers or the Trap Itself
Sometimes tightening does not fix it. That is when I check the washer and the trap more closely.
I replace the washer or the trap if I notice any of these:
- The washer looks flat, brittle, or twisted
- The nut will not sit straight
- The trap looks cracked or out of line
- The drip comes back right after tightening
If the pipe pieces do not line up well, I do not force them together. A crooked fit usually keeps leaking, no matter how hopeful I stand there with a towel in one hand.
Common Mistakes People Make With P-Trap Repairs
The biggest mistake I see is using too much force. That can warp the washer or crack the plastic nut. A common mistake is putting the washer in the wrong way. This prevents it from sealing properly.
Pipe alignment matters too. If someone pulls the parts sideways, the joint may drip even when it looks tight. And one thing I always avoid is adding plumber’s tape to a slip-joint washer connection. That tape does not fix the real seal there, and it can make the repair more confusing instead of better.
What to Do When the Kitchen Sink Water Supply LINE is Leaking
If water shows up while the faucet is running, I check the supply line first. In my experience, leaks in kitchen sinks often begin at the shutoff valve, the connection nut, or the flexible hose. It’s rare for the drain to leak.

I usually notice this kind of leak because the droplets look clean and feel colder than the drain water. On a Saturday morning, I dried everything. I turned on the faucet and noticed moisture near the braided line before the water reached the drain. That made the problem much easier to narrow down.
How to Tell if the Supply LINE is the Problem
The timing gives it away more than anything else. If the leak starts as soon as I turn on the faucet, I stop looking at the p-trap and start looking at the supply side.
A few signs I watch for are:
- The leak starts right when the faucet turns on
- Moisture forms around the braided hose
- Water collects near the shut-off valve
- The drip appears before the sink starts draining
That last clue matters a lot. If water shows up before it even goes down the drain, the drain parts are usually not the cause.
Check the Shutoff Valves and Connection Nuts
I start with a flashlight and a dry paper towel. I check the valve-to-line connection first, then the nut at the top of the hose. If I see green buildup, rust, or white crusty mineral spots, I know that the connection has been dealing with moisture for a while.
If a nut looks a little loose, I tighten it gently and test again. Gently is the key word here. I do not crank down hard because that can make the fitting worse instead of better.
When the Flexible Water LINE Needs Replacement
Sometimes, tightening is not enough. I replace the flexible water line when the hose looks worn or keeps leaking after a careful check.
These are the signs that push me toward replacement:
- The braided line looks frayed
- The rubber line feels stiff or cracked
- The connection still leaks after gentle tightening
- The hose looks old and worn
If the line has age on it, I do not like taking chances. A slow drip today can turn into a bigger mess later, and that is not the kind of surprise I want under the sink.
A Beginner-Safe Replacement Flow
When I replace a kitchen sink water supply line, I keep it simple. First, I turn off both shut-off valves. Then I put a bowl and towel underneath to catch the small amount of water left in the line.
After that, I disconnect the old hose, match the new one by length and connector size, and install it without twisting it. That twisted part matters more than it seems. A twisted hose can stress the fitting and start leaking again.
Once the new line is on, I turn the water back on slowly and watch for seepage. If it stays dry for the first few minutes, I still check it again later. I have learned not to trust a repair too quickly because it behaved for one minute.
How to Reseal a Kitchen Sink Basket Strainer if Water Leaks Around the Drain
If water shows up right under the sink bowl, I check the basket strainer seal early. In my experience, this leak often means the old seal under the drain has dried out, shifted, or isn’t sealing well.
This leak fooled me the first time. I saw a slow, sticky drip under the drain and thought the pipe below was the problem. After filling the basin on a Sunday afternoon, I saw the water rise near the sink drain.
Signs the Basket Strainer Seal Has Failed
A bad basket strainer seal has a few patterns I watch for. The clearest one is water showing up around the drain opening below the sink.
I also pay attention when:
- The leak happens while the basin is full or while it is draining
- The old plumber’s putty looks dry, cracked, or crumbly
- The sink or drain assembly seems to have shifted a little over time
When I see those signs together, I stop blaming the p-trap and focus on the strainer.
Tools and Materials to Reseal Kitchen Sink Basket Strainer
I keep this repair simple. For the seal, I usually grab plumber’s putty or the right sealant for the sink. My basic tools are adjustable pliers or a basket strainer wrench, a putty knife, a rag, and a small bucket.
The rag and bucket matter more than they sound. There is always a little leftover water waiting to make a mess at the worst time.
Step-by-step Resealing Process
I start by disconnecting the drain parts below the sink. Then I loosen and remove the basket strainer. After that, I clean away all the old putty and residue. I do not rush this part because leftover gunk can stop the new seal from sitting flat.
Once the area is clean, I apply fresh plumber’s putty, reset the basket strainer, and tighten it evenly. Then I reconnect the drain pieces and test it with a full sink of water. I like a full-basin test because a tiny leak may not show up with a quick rinse.
What Can Go Wrong During This Repair
The most common problem I have seen is uneven tightening. That can leave one side sealed and the other side dripping. Leaving old putty behind can also ruin the repair.
I always choose the right sealant for the sink material. Some sinks can’t use standard plumber’s putty. I never rush the job. If I test too soon or too lightly, I can miss a slow leak and end up back under the sink again.
How to Handle Water Damage Under the Kitchen Sink After a Leak
Fixing the leak is only part of the job. I’ve found that if I leave the cabinet damp, it smells bad. The wood keeps swelling, and the problem feels endless.

The first time I dealt with this, I thought I had completed the repair once the dripping stopped. Then I opened the cabinet the next day and got hit with that sour, damp smell again. The water had settled into places I had not dried well enough.
First Cleanup Steps Right After the Repair
I start by taking everything out from under the sink. Wet liners, paper goods, sponges, and cleaning bottles all need to come out so the space can breathe.
After that, I dry the cabinet base as well as I can with towels. Then I leave the doors open and let a fan blow into the cabinet for a while. I also check the back corners and the seams along the edges because that is where moisture likes to sit and hide.
How to Clean Minor Cabinet Moisture Safely
If the surface still feels solid, I keep the cleanup simple. I wipe it down with mild soap or a diluted cleaner, then dry it again.
One mistake I do not make now is putting the liner back too soon. That can trap dampness underneath and undo the work I did.
Signs the Water Damage is More Serious
Sometimes, cleanup is not enough. If the cabinet floor feels soft, the wood looks swollen, or the musty smell stays even after drying, I take that as a warning sign.
Dark spots that keep spreading also make me stop and look closer. At that point, I know I may be dealing with more than surface moisture.
When Cleanup Turns Into Repair
If the damage is light, I may only need to replace the liner or seal a faint stain once everything is fully dry. But if the particleboard is crumbling or the base feels weak, I know the job has moved past cleanup.
That’s when I consider replacing damaged panels or getting help, especially if there is mold or serious cabinet damage.
When a Slow Leak is a Quick DIY Fix and When to Call a Plumber
Some slow leaks are simple to fix on my own, but some are not worth guessing at. I handle the easy stuff when the cause is clear, the parts are easy to reach, and the repair stays small. If the leak keeps coming back or the source still feels unclear, I stop and call a plumber.
I had a moment of false confidence on Saturday. I thought I had fixed everything. But later that night, I found the cabinet was damp again. That was a good reminder for me. A basic leak under the kitchen sink is one thing; a hidden problem is another.
Good DIY Repair Situations
I feel comfortable repairing myself when the issue is simple and visible. That usually means one of these issues: a loose slip nut, a worn p-trap washer, an old supply line, or a basket strainer that needs resealing. I can fix these when I can easily access everything.
Those jobs have a clear starting point. I can test them, fix them, and check my work without opening walls or forcing stuck parts. That is usually my line for a safe DIY repair.
Signs You Should Bring in a Professional
I call a plumber when the source of the leak is still unclear after checking the common spots. I also stop if the shutoff valve will not close because that can turn a small repair into a stressful mess quickly.
Corroded metal parts are another warning sign for me. If they freeze in place, I do not like pushing my luck. A damaged cabinet base and a leak from the garbage disposal, wall pipe, or various fixtures are similar. At that point, I would rather pay for a proper fix than turn one leak into two.
How to Prevent Another Leak Under the Kitchen Sink
The best way to stop another leak under the kitchen sink is to check the area regularly. This can help catch issues before they become problems again. A one-minute look now saves a soggy cabinet later.
After I finish a repair, I do not just shut the door and forget it. I always check under the sink after deep cleaning, moving bottles, or using the space a lot. I try not to overstuff the cabinet. Pushing cleaners and bins against the pipes can cause problems again.
After any repair, even if everything initially appears to be in order, I keep an eye out for minor drops. And if a supply line is old, stiff, or worn, I would rather replace it early than wait for a bad surprise on a busy morning.
A Simple Monthly Check Under the Sink
About once a month, I open the cabinet and do a quick check with my hand and eyes. I feel around the fittings, look for fresh stains, and notice whether the space smells damp.
Then I run the water for a minute and look again. That small habit has helped me catch problems early, before they have a chance to soak the cabinet floor.
Frequently Asked Questions
Can I use the sink if it is leaking slowly?
It is better to avoid using it often until you identify the cause. Even a slow leak can damage the cabinet base and make the problem worse.
Do I need plumber’s tape for a P-trap?
Usually, no. In most p-trap connections, the washer makes the seal, not plumber’s tape.
Why does it leak only when I drain the sink?
This usually means the problem is on the drain side. Common causes include the P-trap, tailpiece, or basket strainer.
Why is there water under the sink but no active drip?
The leak may happen only at certain times, such as when the sink drains or the faucet runs. Water can also travel along a pipe and collect in a different spot.
How much does it cost to hire a plumber?
It depends on the cause and damage. A simple repair usually costs less than a hidden leak, a bad valve, or cabinet damage.
Conclusion
Most of the time, a slow leak under the kitchen sink comes from one small part, not some huge disaster. Being patient was the most beneficial thing for me. I found the real source first, fixed that spot, and then dried everything well. This way, the damp smell didn’t return.
I also learned not to trust a repair too quickly. Even after the drip stops, I still check the cabinet a few times over the next 24 hours. I touch the base, look at the fittings, and make sure no new moisture shows up. That extra check kept me from calling the leak fixed when it was not.
