
I fix wet sink plumbing often. A hidden water leak ruins baseboard wood fast. You shut the dark cabinet door and forget the space. Slow drips make the floor soft over time. Here in New Jersey, changing seasons and summer humidity make cold pipes sweat heavily. You need a reliable way to keep the cabinet floor dry to stop rot early.
An adjustable wrench fixes loose pipe nuts easily. I use a simple moisture meter to find deep, wet spots. Moving air keeps your cabinet safe and clean. You must block water leaks first. I will share a practical way to keep your dark cabinet space dry.
Why Moisture Builds Up Under the Kitchen Sink in the First Place
Moisture builds up under your sink because dark cabinets trap slow drips, pipe sweat, and humid room air. You cannot fix a wet floor until you find exactly where the water comes from.
Last Tuesday, I opened a client’s cabinet in Mt Arlington and smelled wet cardboard. I had to trace the actual water source before wiping anything up.
Slow Leaks That Nobody Notices
Tiny drips from loose metal fittings cause the most hidden damage. A loose drain nut weeps two drops an hour. You never see a puddle because the pressed wood floor absorbs it instantly.
I always run my dry fingers under the hot water valve. Even a tiny wet spot tells me a slow leak is softening the base.
Why Condensation Is a Separate Problem
Your cold water supply lines act like magnets for warm, sticky air. When humid kitchen air hits a cold metal pipe, heavy water drops form. This pipe sweat falls onto the wood base all summer long.
Tightening a loose nut never stops this daily sweat. You need a proper pipe insulation setup to block that warm air from touching the cold metal.
Humidity That Enters From Outside the Cabinet
Wet air rises through open floor gaps around your deep pipes. Heavy kitchen humidity also rushes in every time you open the door.
You pack the cabinet tight with plastic cleaning bottles. That sticky air has nowhere to go. It settles on the back walls and feeds a slow, quiet water trap over the years.
Under Sink Leak Detection and Repair – Finding the Problem First
You must find and fix active leaks before adding any mats or sealants. Covering a wet pipe traps the water and rots your floor faster.

Last Friday, I tried to skip this step to save time. I covered a slow drip with a flat rubber mat. The water pooled underneath and smelled musty two days later. Keeping the cabinet dry demands a clean start.
How to Check Every Connection Properly
Pull every bottle and box out of the cabinet. Turn your faucet on high for two minutes. Grab a dry paper towel and a bright flashlight.
I always touch the metal supply lines, the plastic P-trap joints, and the wall drain with the dry paper. If the paper gets wet, you found your drip. Put a piece of blue tape on that exact spot so you do not lose it.
Simple Repairs Most Homeowners Can Do Themselves
You can fix most small leaks with basic tools.
- Supply lines: Grab pliers and turn the loose metal nut a quarter turn. Hand-tight is never enough to stop a slow leak.
- P-trap joints: Unscrew the plastic rings. Clean the dirty threads, wrap them in white plumber tape, and screw them back tight.
- Floor gaps: Squeeze clear silicone caulk around the wide pipe holes in the base. This blocks damp air from floating up.
Checking these three spots first solves most common water issues. These small repairs stop the wood from soaking up silent drips every day.
When a Leak Needs a Plumber
Stop working if the water comes from deep inside the wall. Call a pro if a tight metal fitting keeps dripping or if a rubber hose looks cracked.
I once tried to tape a cracked supply hose. It burst the next morning and flooded the kitchen. Paying a plumber costs money today, but it protects your floors tomorrow.
Stopping Pipe Condensation at the Source
You stop pipe sweat by wrapping bare cold water lines in foam insulation tubes. This blocks warm air from hitting the freezing metal and creating heavy water drops.

Last August, I watched sweat drip off my bare pipes like a cold drink glass. My cabinet floor stayed damp until I covered the metal.
How to Wrap the Supply Lines
Foam pipe sleeves solve this issue fast. They come pre-slit down the side, so you snap them directly onto the pipes without tools.
I bought a set for three dollars and put them on in ten minutes. It felt good to touch dry foam instead of wet metal.
Fixing Sweaty Drain Pipes
Plastic drain pipes sweat less often. If yours feel wet, wrap them tightly with self-adhesive insulation tape.
Layer the tape over itself to seal the cold air out. This fast step helps control daily cabinet moisture.
Protect the Cabinet Surfaces After Resolving Leaks and Condensation
You protect the dry wood by painting a clear sealant and laying a thick rubber mat. Sealing the bare floor keeps future spills on top of the surface.

Last week, I finished fixing a loose metal pipe. I felt relieved to see the joint stay dry. But I knew the pressed wood still needed a simple shield against daily use.
Sealing the Cabinet Interior for Long-Term Protection
Brush a waterproof primer over the flat floor and the lower wooden walls. I buy a small can of clear moisture-blocking sealant for this specific step.
I use a simple brush to coat the deep back corners. Those dark spots are where water pools and sits the longest. Painting two thin coats works much better than spreading one thick layer. It dries fast and turns the soft wood into a firmer surface.
Adding a Waterproof Liner as the Final Surface Layer
Place a tray-style waterproof liner over the dry paint to catch new kitchen spills. A flat plastic sheet lets water roll right off the edges.
You need a thick mat with tall, raised sides. These firm lips hold the liquid safely like a shallow baking pan. I cut the rubber carefully around my drain pipes so it lays flat. If the corners buckle, water sneaks underneath the mat. A snug fit finishes your under-sink moisture protection the right way.
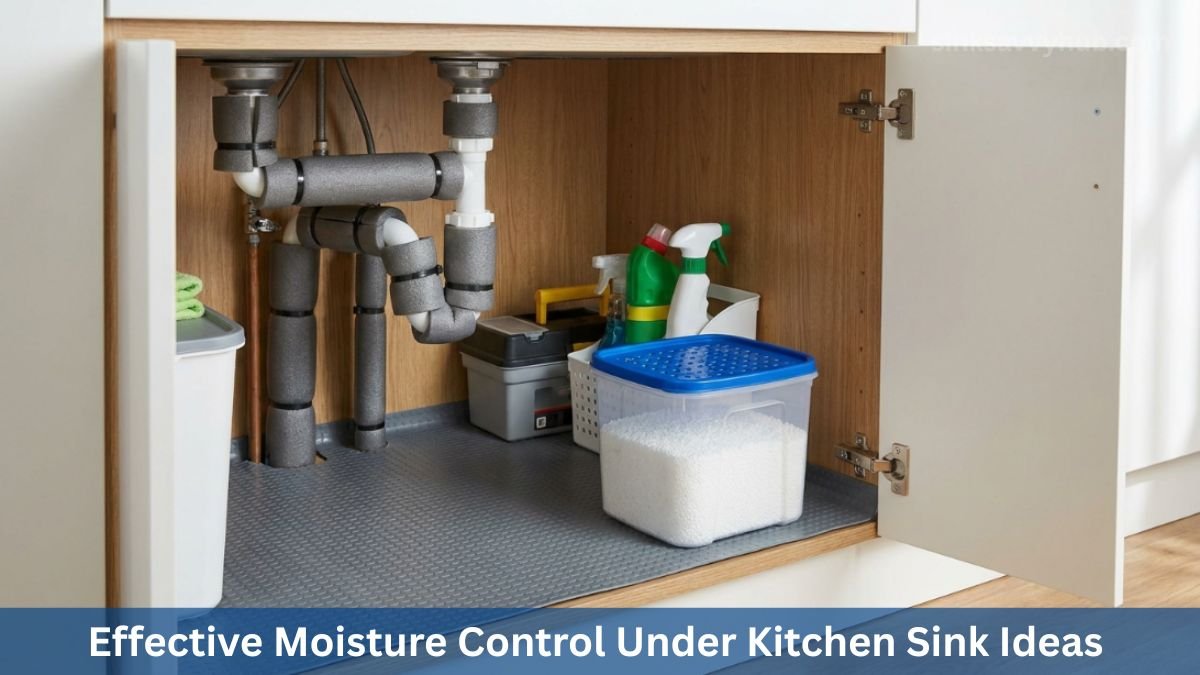
Controlling Ambient Humidity Ongoing With Moisture Absorbers
You need a moisture absorber to pull the sticky dampness right out of the trapped air. Even a perfectly sealed cabinet cannot stop heavy summer humidity.

Last July, my kitchen felt fine, but the trapped air inside my cabinet warped a cardboard box. Dropping a simple moisture trap inside fixes this quiet issue.
Types That Work Well in This Space
Different levels of wet air need different tools.
- Silica gel canisters: These small beads work great for slightly damp spots. You can bake them dry in your oven and use them again.
- Calcium chloride buckets: I buy these cheap tubs for very humid homes. They trap heavy moisture fast, and you toss them when they fill with water.
- Mini dehumidifiers: These small electric units handle deeply wet cabinets nicely. You plug them into an outlet to recharge them.
Selecting the right tool depends on how much water is in your air. These traps keep the dark space smelling fresh and clean all year.
Placement Makes a Difference
You must put your absorber in the deep back corner where the air stays completely still. The front space gets fresh air every time you open the door.
I tuck a plastic tub right behind the drain pipe. I check the water level on the first Sunday of every month. Checking it regularly stops dirty water from spilling over onto the floor.
Ventilation Solutions for Cabinets That Stay Damp
You can fix a stubborn, damp cabinet by creating simple paths for fresh air to move. Moving air dries out the dark space naturally.
Last spring, my sink cabinet still felt sticky after I fixed the pipes. The tight wooden box needed to breathe. I cleared out my crowded bottles. Leaving a two-inch gap against the back wall lets the trapped air flow.
Next, I drilled three small holes in the hidden side panel and glued bug mesh over them. This lets fresh kitchen air slip inside all day. For heavy humidity, plug a tiny USB fan inside the cabinet. Good airflow helps your cabinet stay dry.
A Monthly Routine That Keeps the Space Dry
A quick monthly check keeps your system running well. You empty the dark cabinet, feel the metal pipes, and look for new water spots.
Last Sunday morning, I pulled out my soap bins and grabbed a dry cotton cloth. I wiped the plastic drain joints and checked the deep back corners. The wood felt firm and dry. It was good to see the setup holding up.
Next, I checked my moisture trap to see if it needed a refill. Catching a slow drip during this two-minute habit costs almost nothing to fix. Skipping it could lead to a ruined base.
Frequently Asked Questions
How do I control moisture under my kitchen sink?
Fix leaks and dry the wood first. Add a thick rubber mat and a moisture absorber. Good habits keep the dark space under your sink fresh and dry.
How do I stop cold sink pipes from sweating?
Snap foam tubes over your bare cold lines. This blocks warm air from hitting the cold metal. It stops daily pipe sweat and keeps your floor dry all year.
What are the best moisture absorbers for a sink cabinet?
Calcium chloride tubs pull heavy water from the air in very humid homes. Silica gel canisters work well for smaller, mildly damp cabinets in your house.
How can I improve ventilation under my sink?
Leave gaps between your soap bottles and the back wall. You can also drill small vent holes in the side panel to let fresh air move inside the cabinet.
How do I check for hidden under sink leaks?
Run your faucet and touch each joint with dry paper. A wet spot on the paper shows you exactly where the drip is. Tape the spot so you can fix it fast.
Simple Habits Keep the Sink Cabinet Dry
Moisture control under the kitchen sink works when you fix leaks, seal the bare wood, and trap the damp air. Keeping the cabinet dry takes a little practical planning.
I check my own sink base regularly here in New Jersey. The wood stays firm, and it smells clean. It is nice to know a basic setup works.
You need to look inside once a month. Keep your bottles tidy, feel the cold pipes, and swap the moisture trap. That easy habit protects your wood floors.
